How to Change Intel CPU Microcode
By replacing the microcode update in the latest BIOS file
How to Change Intel CPU Microcode
If you need to change the microcode but still want the latest BIOS features and fixes, you’re in luck! I’ll share how I managed to do this relatively easily.
Why do You Want to Change the Microcode?
Depending on the generation of Intel CPUs, you might have different reasons for this:
- You may want to receive security enhancements, stability improvements, and performance optimizations from the latest microcode released by Intel, but your motherboard manufacturer has abandoned support or failed to keep the microcode up to date.
- In my case, downgrading the microcode helps regain 5-30% of the performance lost (depending on the workload) due to Spectre and Meltdown patches.
Things you’ll need
- Python - Download
- UEFI BIOS Updater (UBU) - UBU_v1_80_a17_fixed.zip
- HWinfo64 - Download
- Old & new BIOS file of your motherboard
Preparations
- Install Python.
- Extract the old & new BIOS files in seperate folder.
- Extract
UBU_v1_80_a17_fixed.zip. - Open Hwinfo64 and take note CPU ID from there.
How to do it (Step-by-Step)
Flashing modified BIOS may brick your motherboard.
Part 1: Extracting Old Microcode from the Old BIOS File
- Delete
bios.binfrom the UBU folder if present. - Open
UBU.cmdand select your old BIOS file (e.g.,E7B53IMS.110). - Choose Do not use MMTool (press
0). - Select CPU Microcode (press
5). - Press
Xto extract all CPU microcodes, then close the window. - Go to
.\Extracted\Intel, find the file matching your CPU ID (e.g.,cpu906EA_...), and copy it. - Paste it into
.\Files\intel\mCode\USR_mCode. - Run
GenUSRmC.batin.\Files\intel\mCode, then close it. - Part 1 complete.
Part 2: Replacing the Microcode in the New BIOS File
- Delete
bios.binfrom the UBU folder if present. - Open
UBU.cmdand select your new BIOS file (e.g.,E7B53IMS.1D0). - Choose Do not use MMTool (press
0). - Select CPU Microcode (press
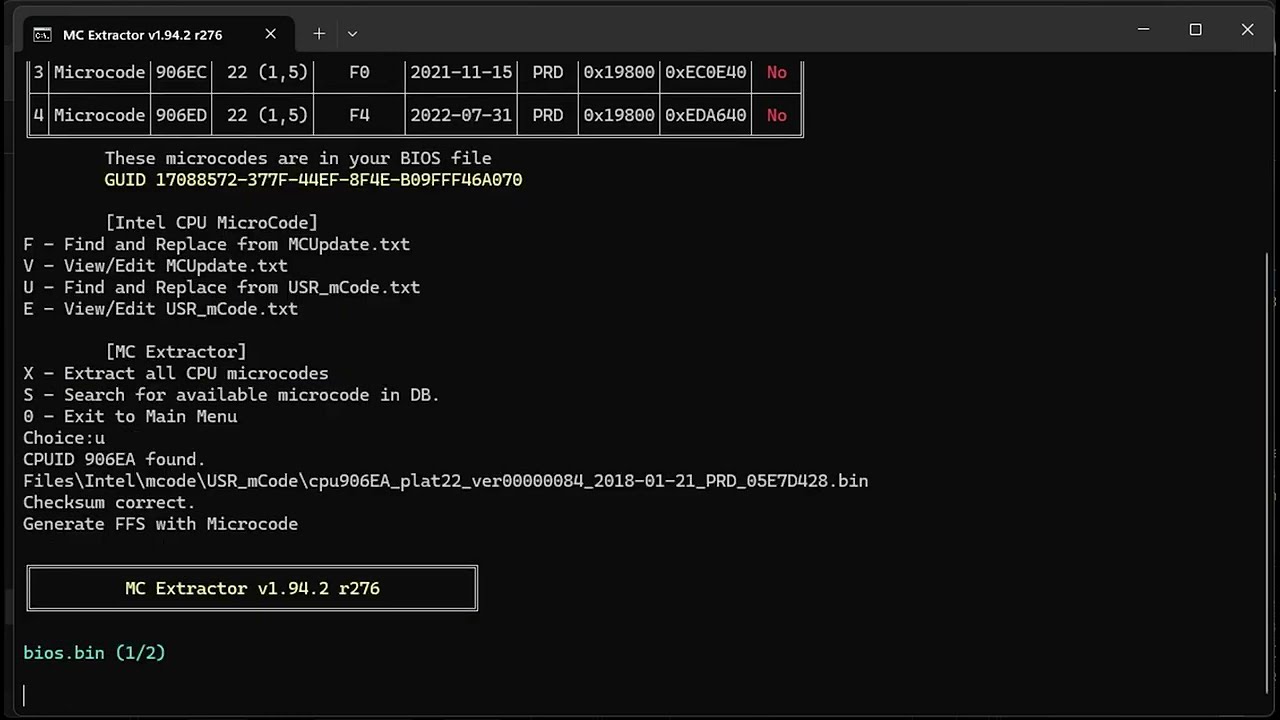
5). - Press
Uto replace microcode usingUSR_mCode.txt. - Confirm the “Checksum correct” message.
- Press
Rto start the replacement, then press any key. - Exit the tool, rename the new file if necessary (e.g.,
mod_E7B53IMS.1D0), and flash it. - Part 2 complete.
You can proceed to flash the BIOS that you have modified.
Flashing modified BIOS may brick your motherboard.
| Before | After |
|---|---|
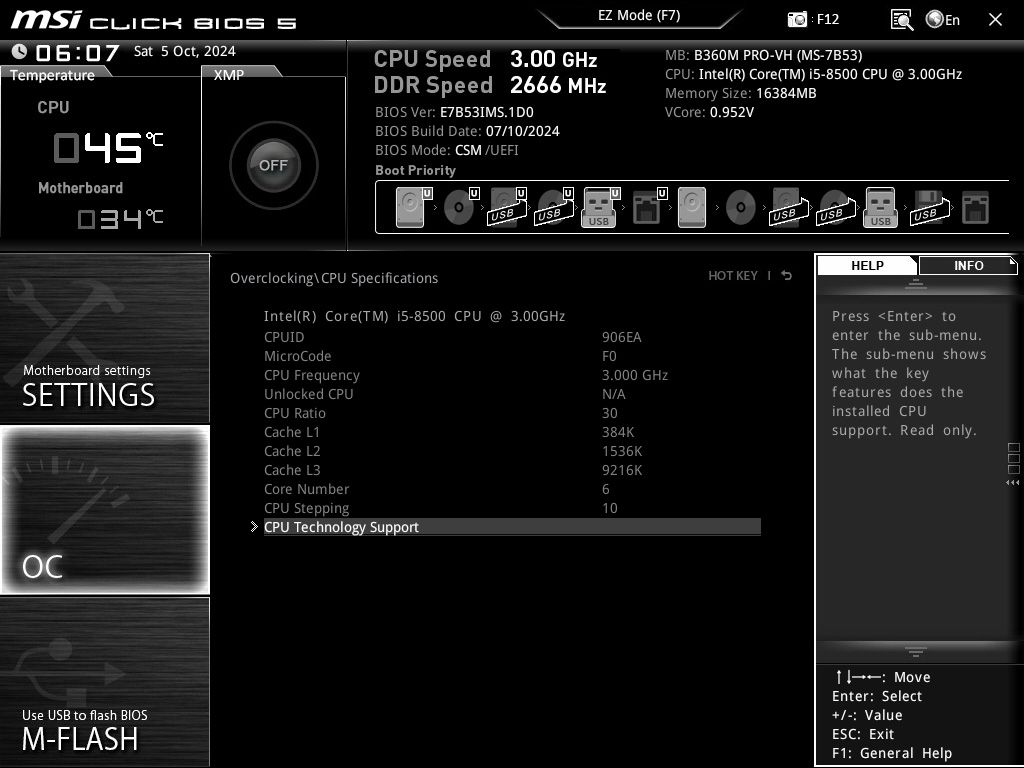 | 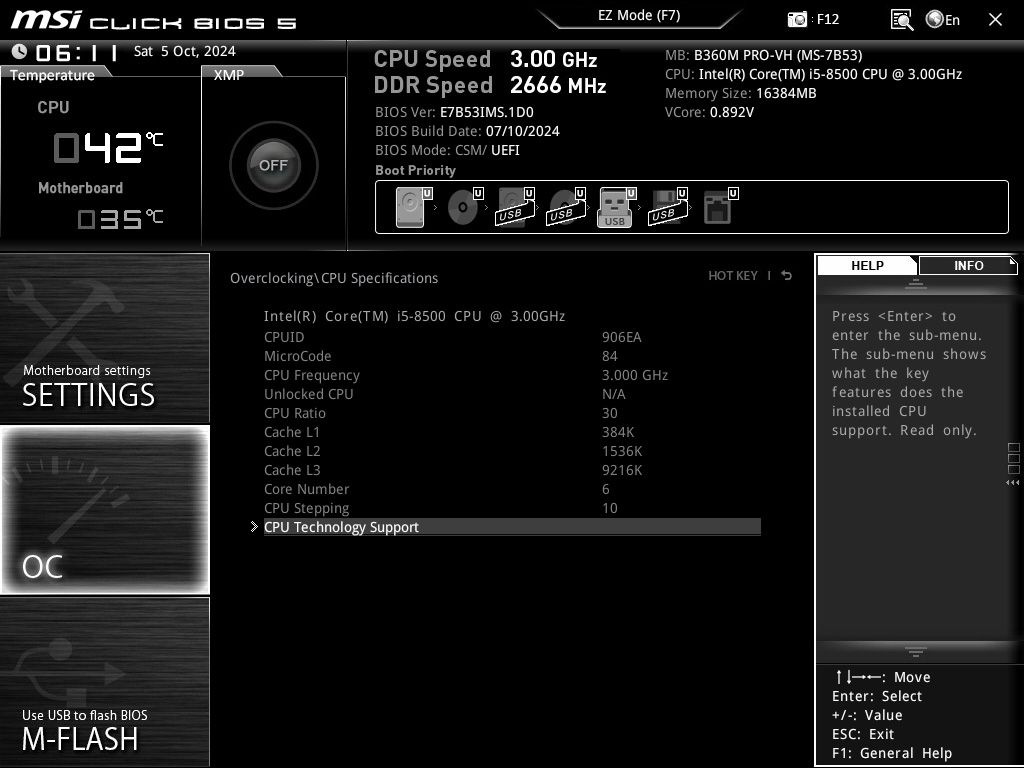 |
Research
This post is licensed under CC BY 4.0 by the author.