Configuring TMNet UniFi ISP through OpenWrt Web Interface
UniFi is a popular internet service provider in Malaysia, and OpenWrt is a free and open-source firmware for routers that allows for greater control and customization. This tutorial will guide you through the process of configuring UniFi on your OpenWrt router using the web interface.
Step 1: Connect to your OpenWrt router
Connect your computer to the router via Ethernet cable or Wi-Fi, and access the router’s web interface by typing the IP address into your web browser’s address bar. The default IP address for OpenWrt is 192.168.1.1.
Step 2: Navigate to Network Interfaces
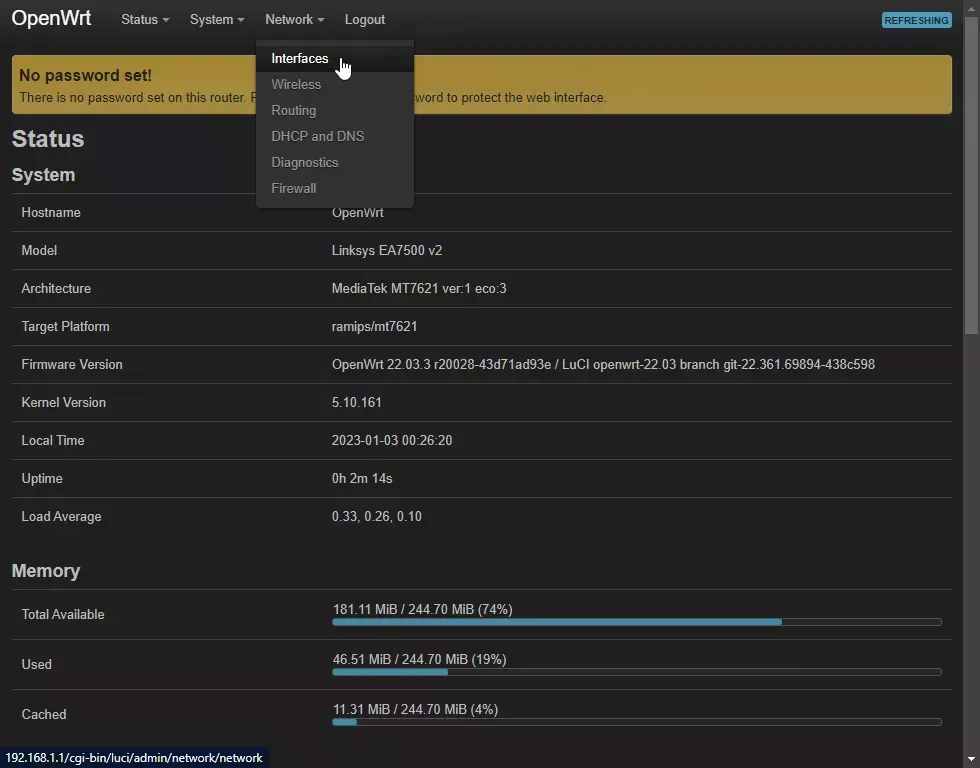
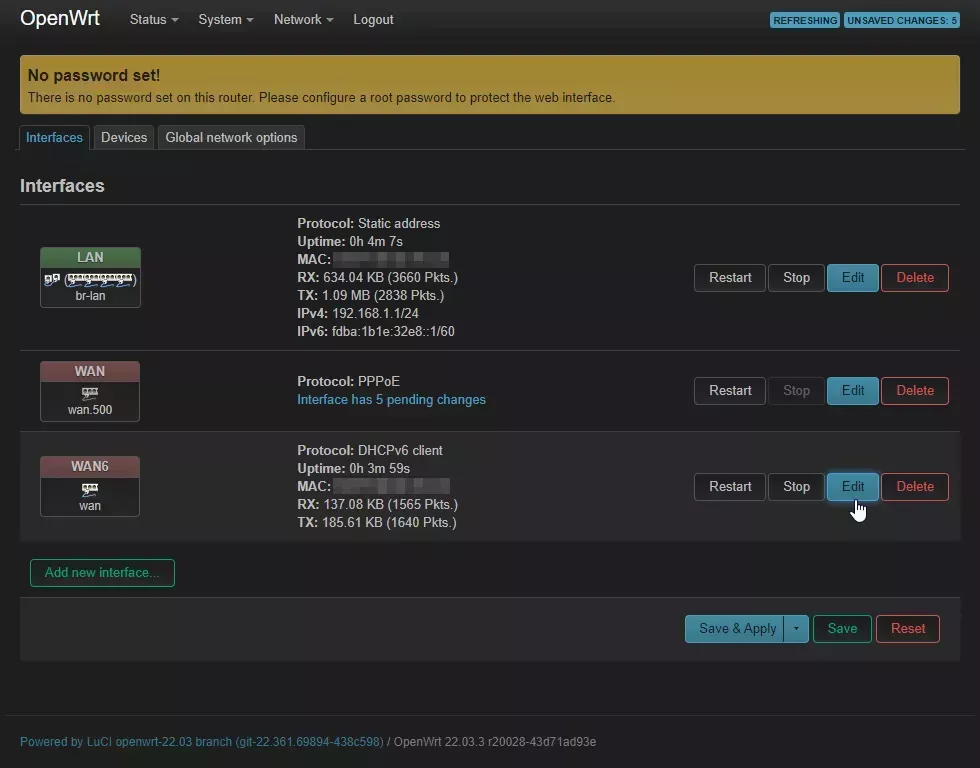
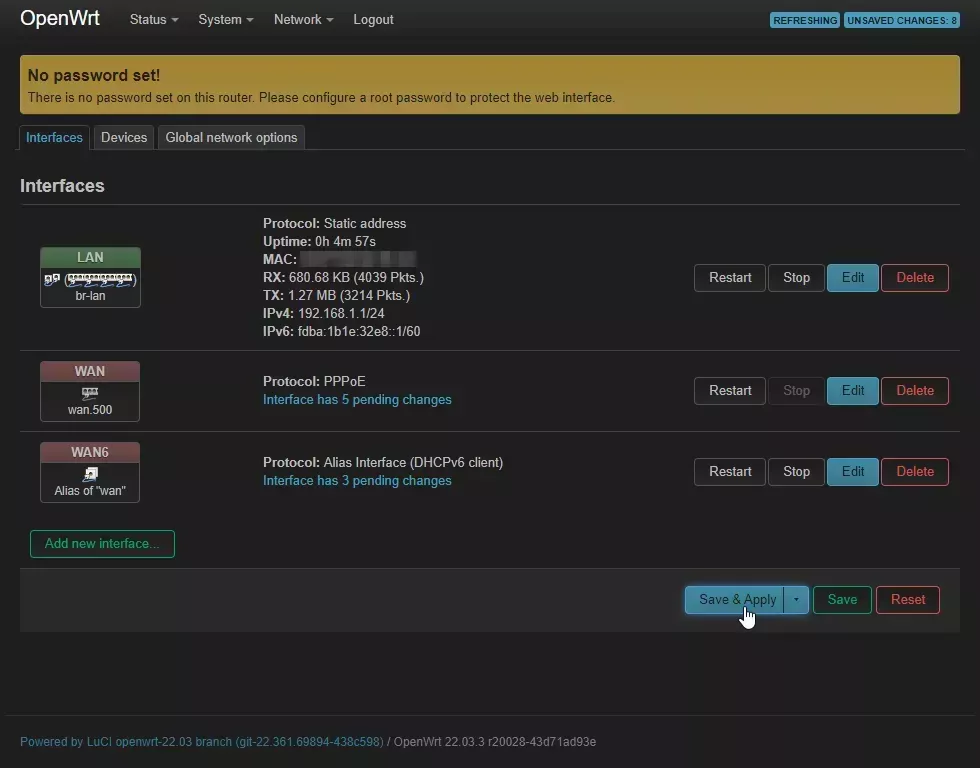
From the web interface, navigate to Network » Interfaces. Here, you can configure your router’s network interfaces.
Step 3: Configure WAN interface
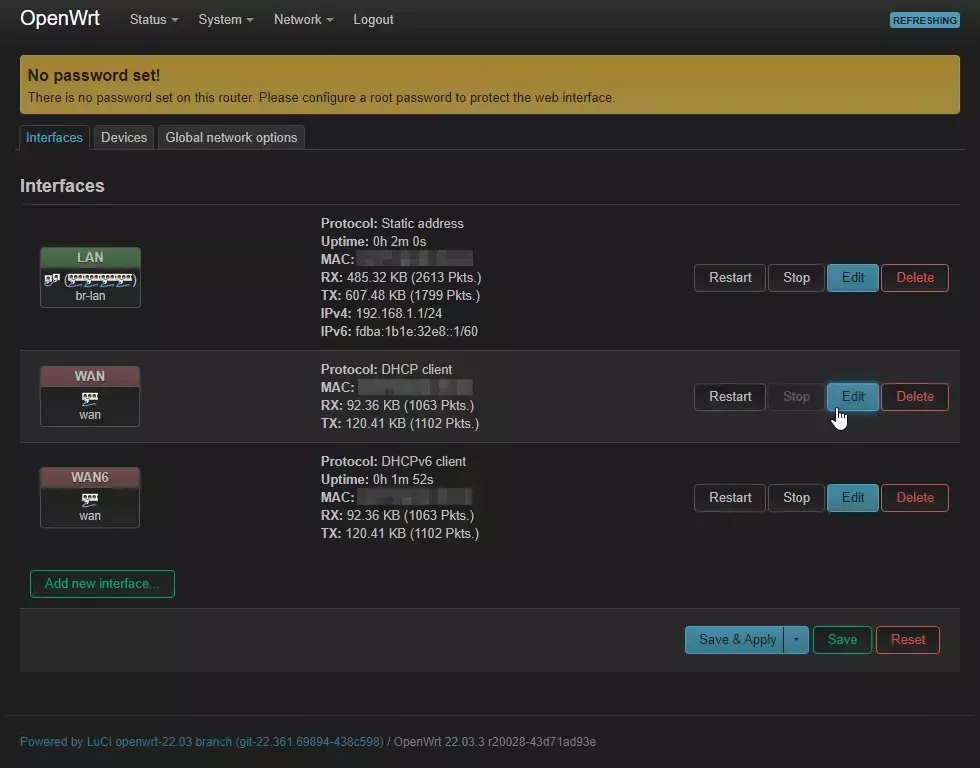
Under the WAN section, click on Edit.
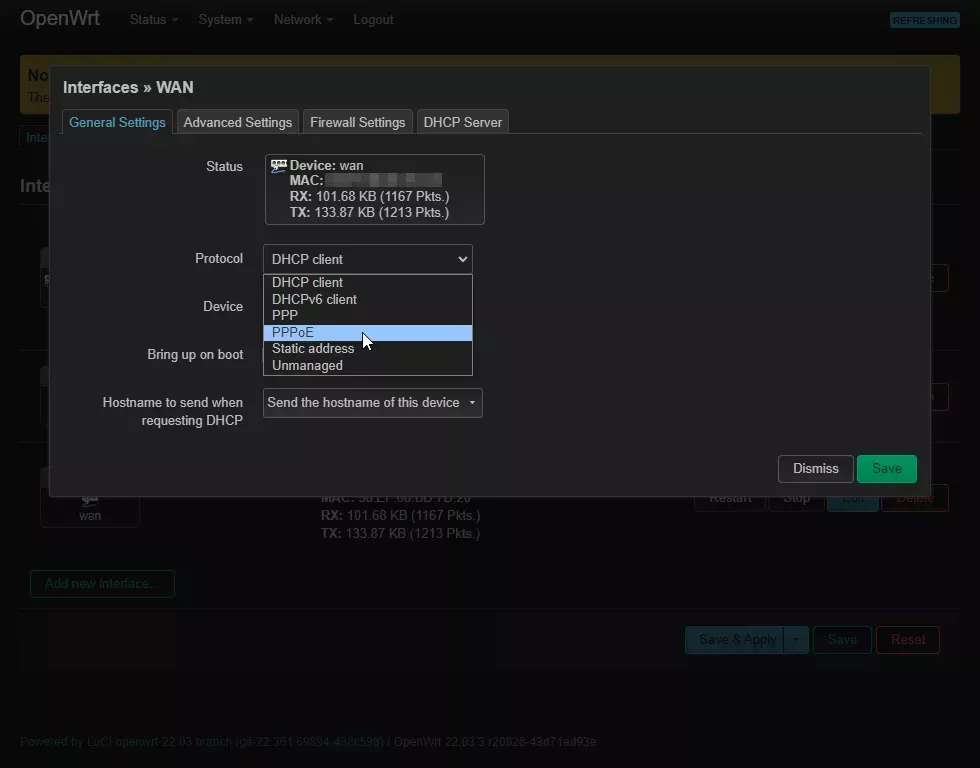
In the General settings tab, set the following:
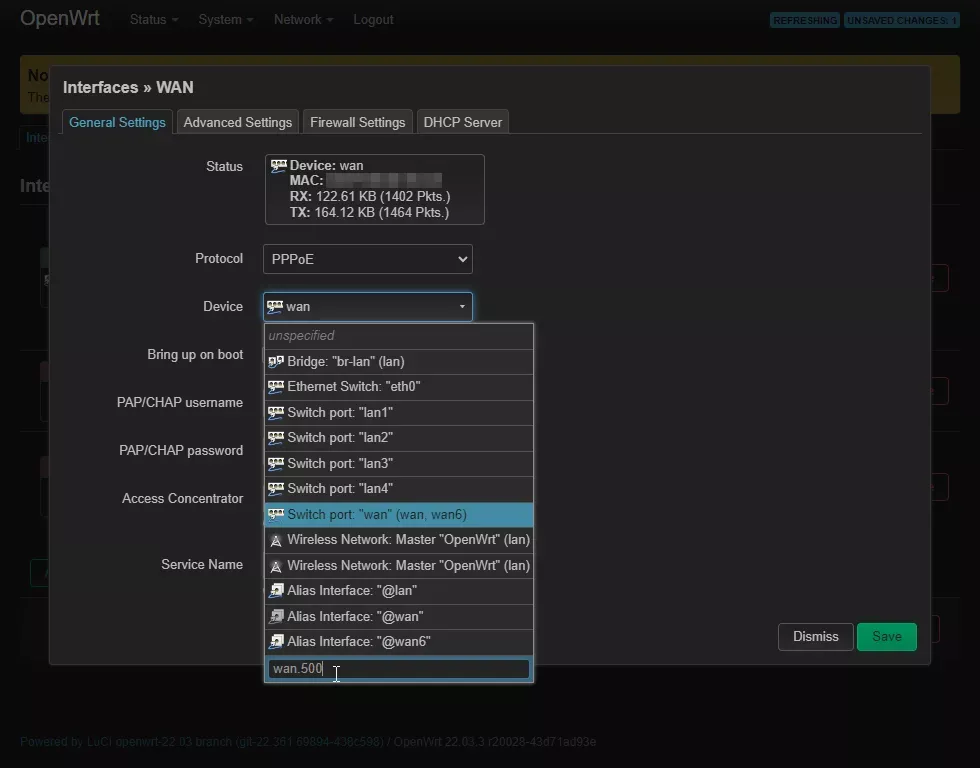
Protocol: PPPoE
Click on Switch protocol
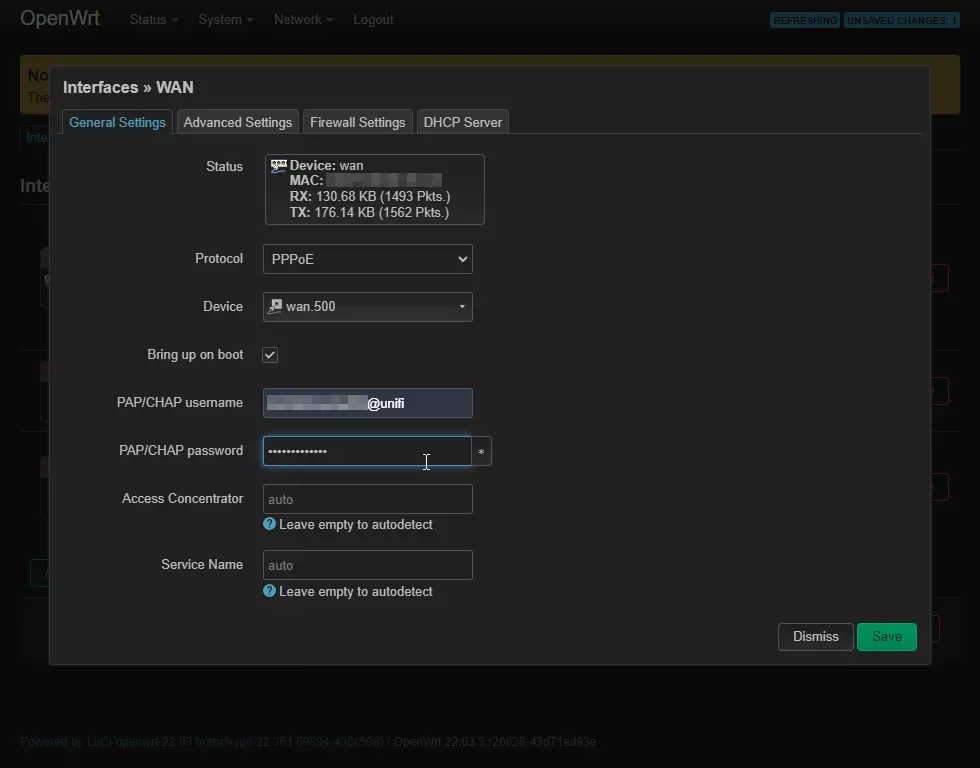
Under the Device section, you will need to manually type the device name wan.500 & hit Enter.
In the PAP/CHAP username field, enter your UniFi account login, for example, adbdulwahub69@unifi. In the PAP/CHAP password field, enter your UniFi account password.
Click on Save to save your settings.
Step 4: Configure WAN6 interface
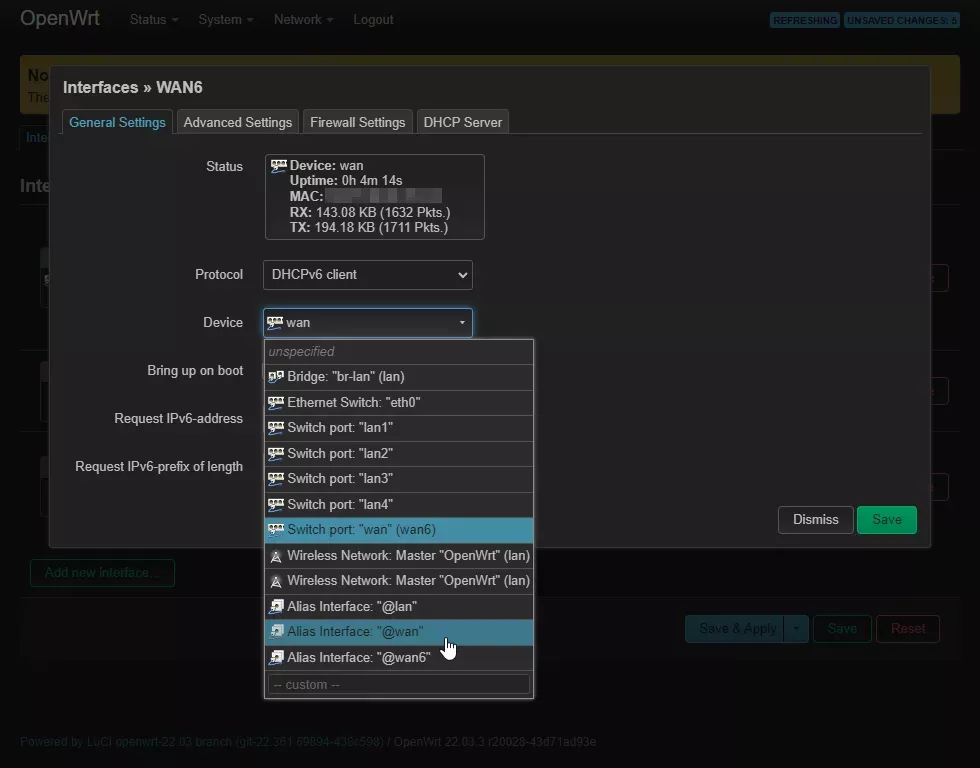
Under the WAN6 section, click on Edit.
Under the Device section, select Alias Interface: @wan.
Click on Save and then click on Save & Apply to apply the changes.
Step 5: Verify connection
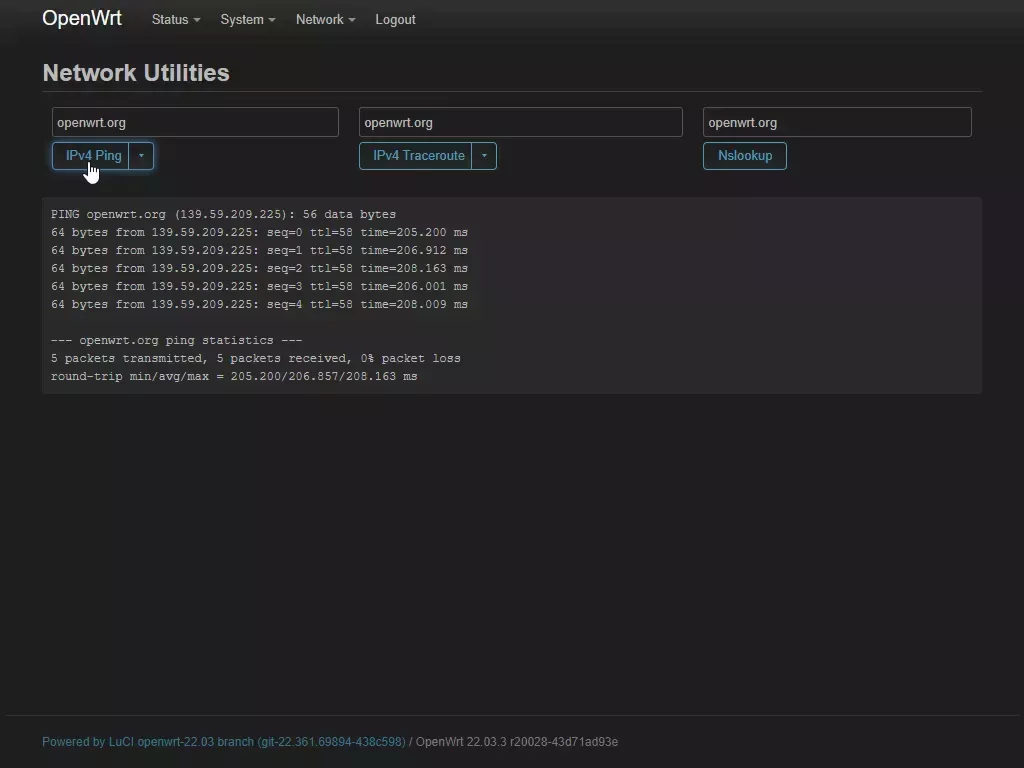
To verify that your UniFi connection is working, navigate to Network » Diagnostics and click on IPv4 Ping. If the ping is successful, then your UniFi connection is working properly.
Congratulations, you have successfully configured your UniFi connection on your OpenWrt router!
